Navigation
The final stage in setting up the Torrent Remote app is adding a connection to the app itself.
Note
You must complete the following two stages before attempting this one:
Additionally, if you are wanting to add a connection over the Internet, you must also follow the steps here: Setting up for access over the Internet.
Warning
If you are running the Torrent Remote app on the same computer as the uTorrent desktop program, and wish to connect to it, please see Workaround for connecting on the same computer before following below. This page contains important information for this scenario where the Torrent Remote app is used to connect to the uTorrent desktop program running on the same computer. If you do not follow this page, the local connection will not work. Note that this configuration is not officially supported - heed the warning on the page.
Adding your connection
In order to successfully add your connection and start managing your torrents remotely, you will need the following information from the computer running the uTorrent desktop program:
-
IP address of that computer (referred to as “the IP address” from here on).
This is the static IP that was configured during the steps on the page Setting up for access on a local network. If you are connecting on the same computer, you should use 127.0.0.1 as the IP address. If you are connecting over the Internet, you will need your Dynamic DNS name (host) or external static IP address which were set up during the steps on the page Setting up for access over the Internet__. -
Port that uTorrent is configured to listen on (referred to as “the port number” from here on).
This is the port that the uTorrent desktop program uses to connect to other peers on. You can find it out by doing the following in uTorrent:- Click Options and then click Preferences.
- On the left select Connection.
- The value you want is in the box labeled Port used for incoming connections.
You may have configured an alternative listening port on the page Turning on the Web UI in uTorrent. If you did, you will need to use this port instead.
-
User name and password (referred to collectively as “the credentials” from here on).
This is the user name and password that you set during the steps on the page Turning on the Web UI in uTorrent.
Once you have all of the above information ready, its time to add the connection to the Torrent Remote app. The below steps outline how to accomplish this.
- Start by opening the Torrent Remote app on your device.
- On the main screen, tap or click the Add server tile. The add server flyout appears from the right (See Figure 1).
- In the first box, type a Friendly name of your choice - this is the name that will appear on the main screen for this new connection.
- In the next box, type the host or IP address.
- Finally, in the last box, type the port number.
- Tap or click the Add button to complete the process.
You should now see your newly added connection appear as a new title on the screen. It will be titled with the Friendly name you entered in step 2.1 above. The first time that you tap or click the tile for your connection, you will be prompted for your credentials. Once you enter them, your torrent listing will load and you are done! You are now able to view, control and add new torrents to your remote instance of the uTorrent desktop program.
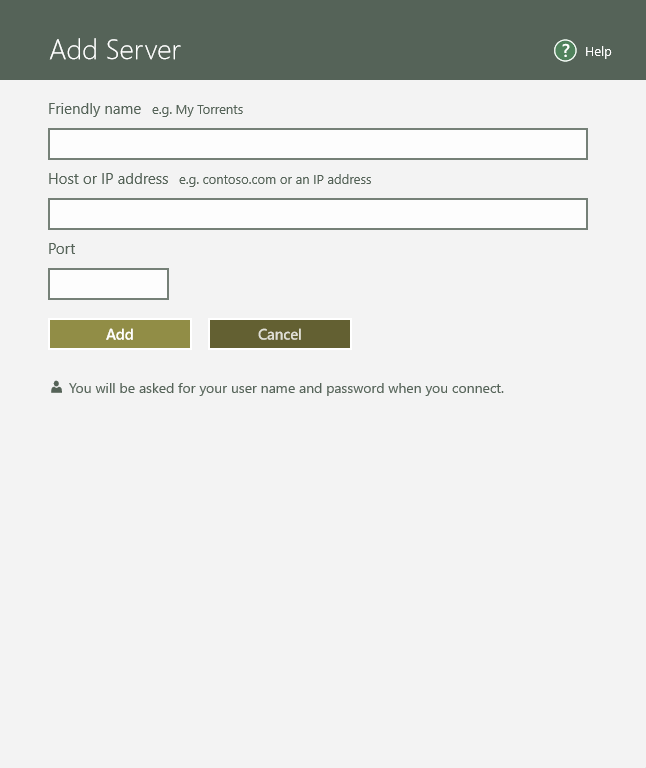
Figure 1. The add server flyout.